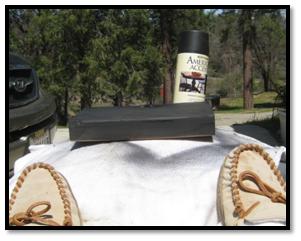
Do you have an object with special meaning that just sits in a in your home collecting dust. Why not turn it into a lamp. It’s easy, inexpensive and will help fulfill your creative needs.
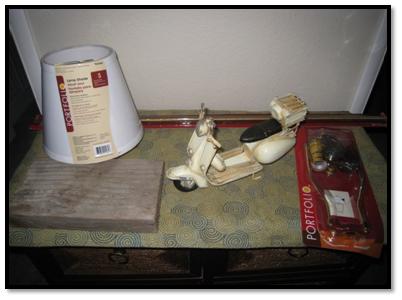
Here are the supplies:
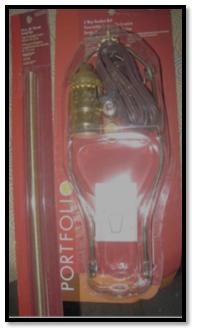
1) Lamp Kit (from most hardware stores)
2) Threaded rod sold at hardware stores.
3) Lamp shade to fit the scale of your project
4) Object that you want to show off. (Scooter was for my step-daughter)
5) Scrap lumber.
 6) Ribbon to cover rod.
7) Spray paint for the wood.
8) Felt and craft glue
9) Sandpaper
Tools: Hand saw, hack saw, drill, chisel
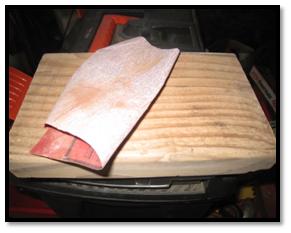
Step One
• Sand the lumber for a smooth surface on all sides and edges after it has been cut to the size you need.
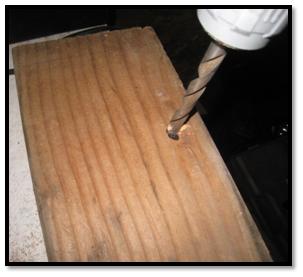
Step Two
• Drill a hole through the lumber for the threaded rod to fit through.
Step Three
• Cut the threaded rod to size with a hack saw. I used a vise to hold the rod steady while I cut it.

Step Four
• Spray paint the wood and relax while it dries.
Step Five
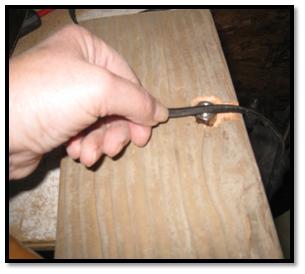
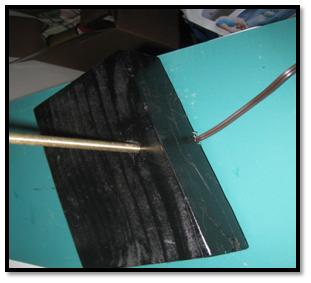
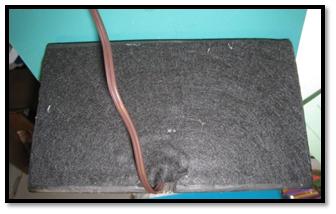
• Place the bolt, for the bottom of the threaded rod over the drilled hole and chisel out area needed to keep it flush with the bottom of the wood base. Also chisel out a “ditch” for the electrical cord to fit in to.
Step Six and Seven
• Attached bolt to rod and push rod through the drilled hole. Make sure that all items are flush to the bottom of the board or it will wobble.
• Push the electrical cord, from the kit, through the threaded rod.
Step Eight
 • Follow the directions from the Lamp Kit to determine the length of the electrical cord. You will have to tie an underwriter’s knot for this step. Google underwriter’s knot and you will find some good how-to videos and instructions.
Step Nine
• Glue felt to the bottom of the wood base so that it doesn’t scratch another surface
Step Ten
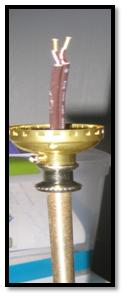
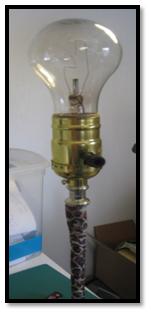
• Follow the directions in the lamp kit to assemble the lamp socket and plug.
• I selected an animal print ribbon to cover the threaded rod. First I applied crafter’s glue to the rod and then wrapped with the ribbon.
Final Step
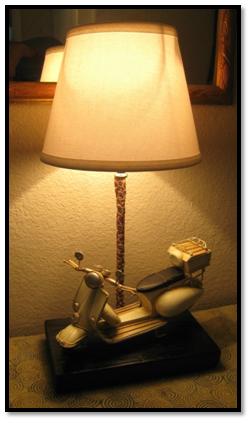 • Attach light bulb, lamp shade and place the decorative object on the base.
Enjoy your creation!
Now you can start dreaming of other objects that could become one-of-a-kind lamps. Two of my favorites are a Philippine Woven Backpack lamp and a Cowboy Boot Lamp.